

About ColorWheels
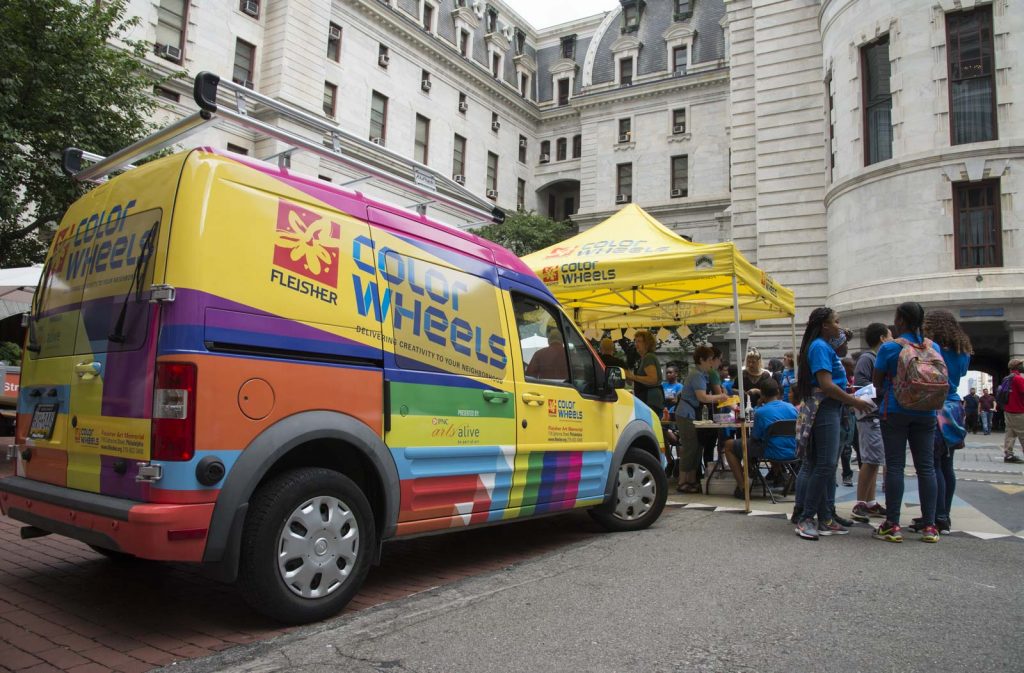
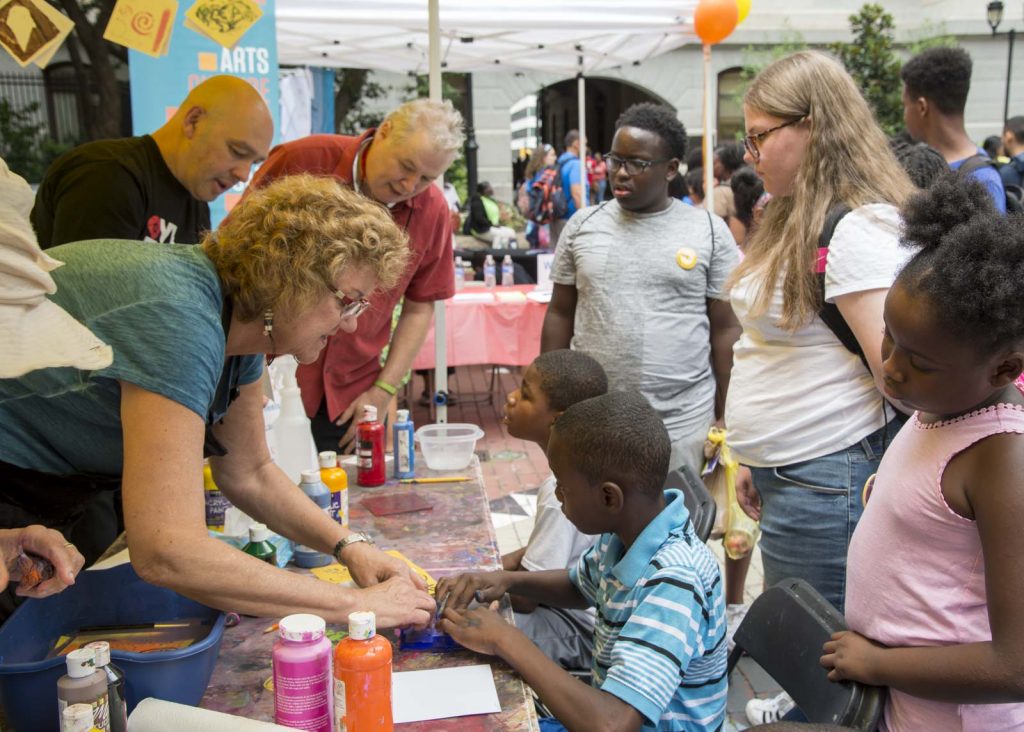
Dubbed the “Swiss Army Knife of art,” Fleisher’s mobile art studio ColorWheels has delivered creative experiences directly to community members in neighborhoods throughout Philadelphia since 2012.
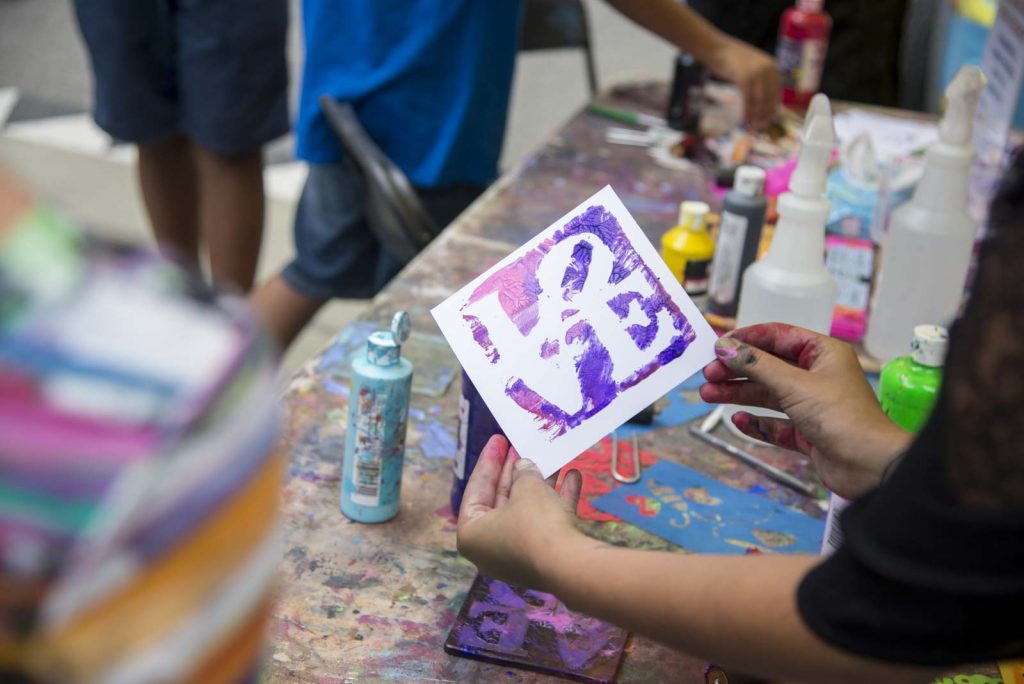
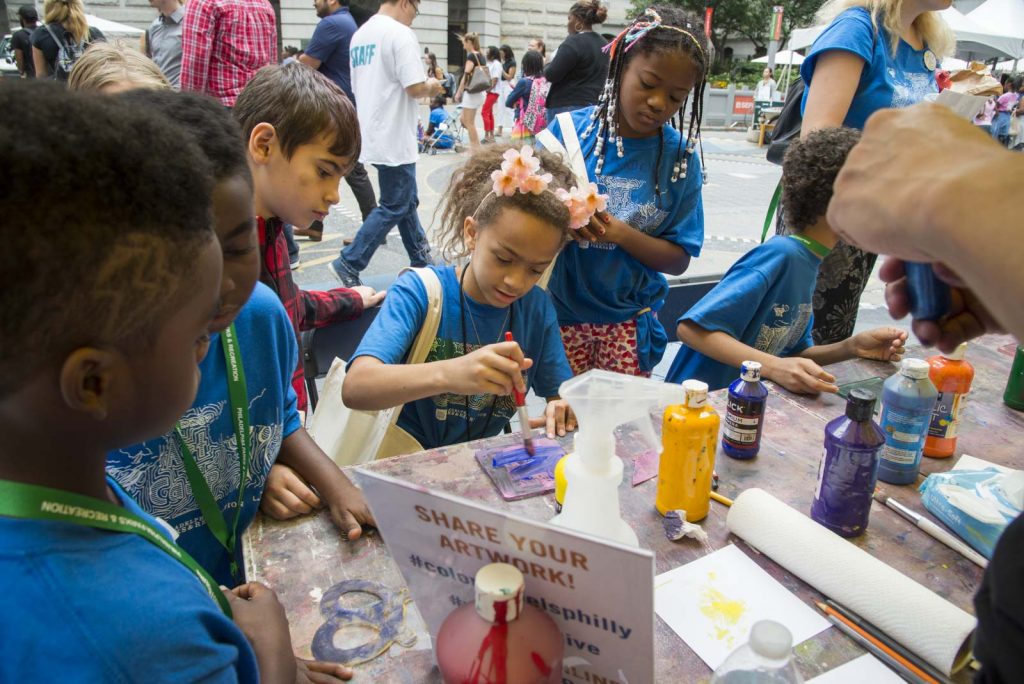
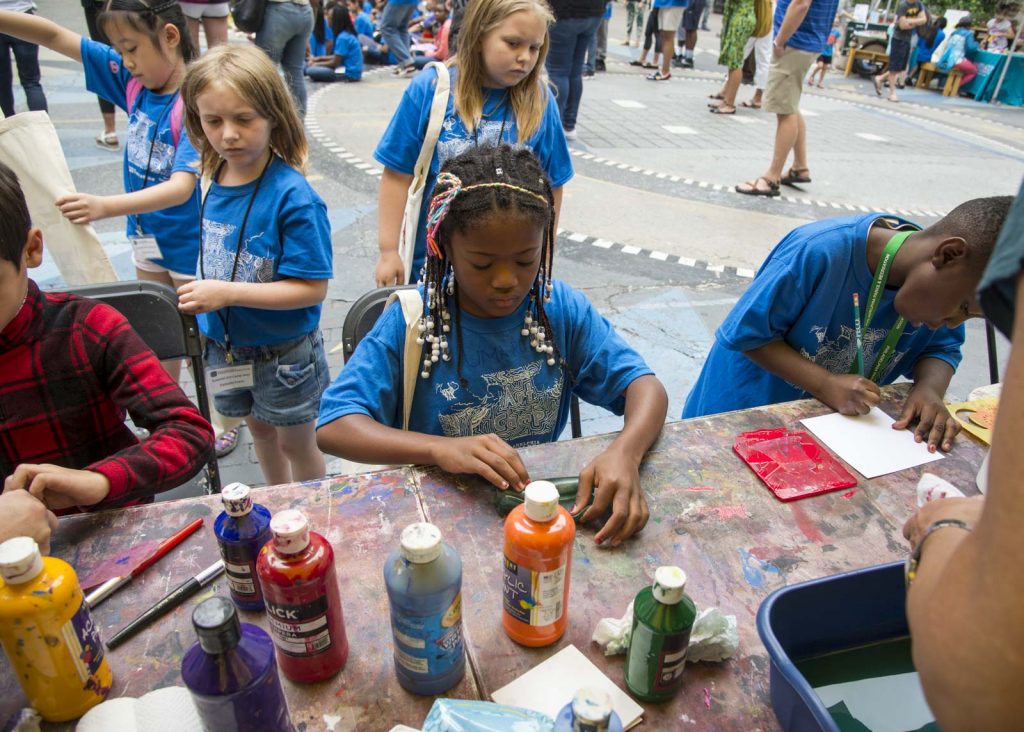
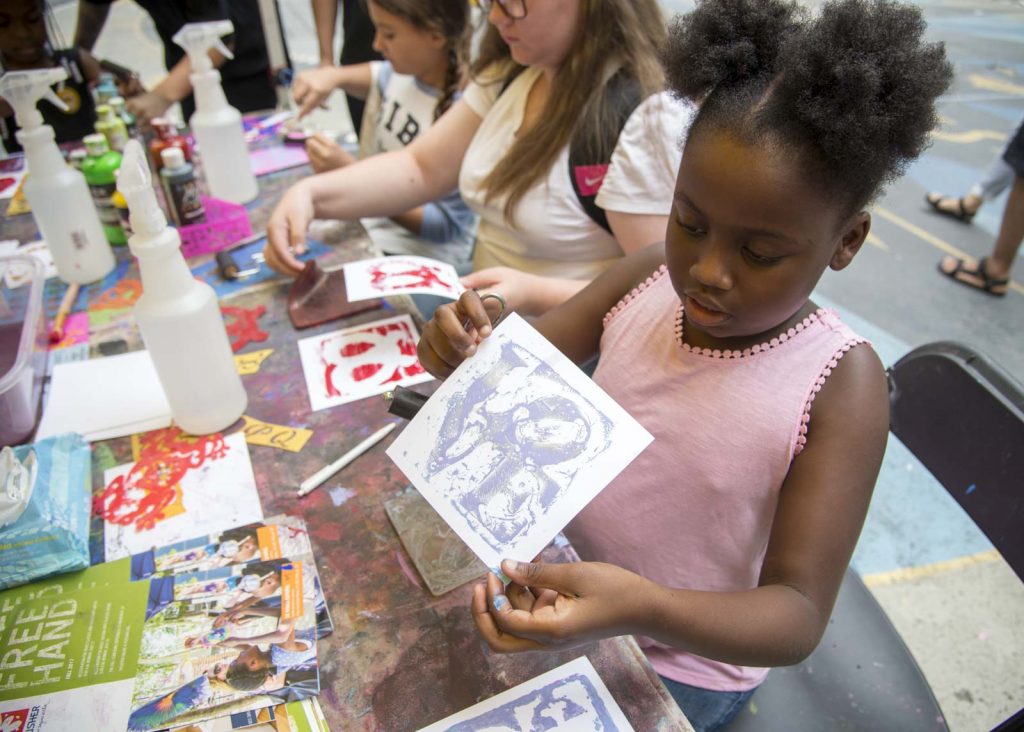
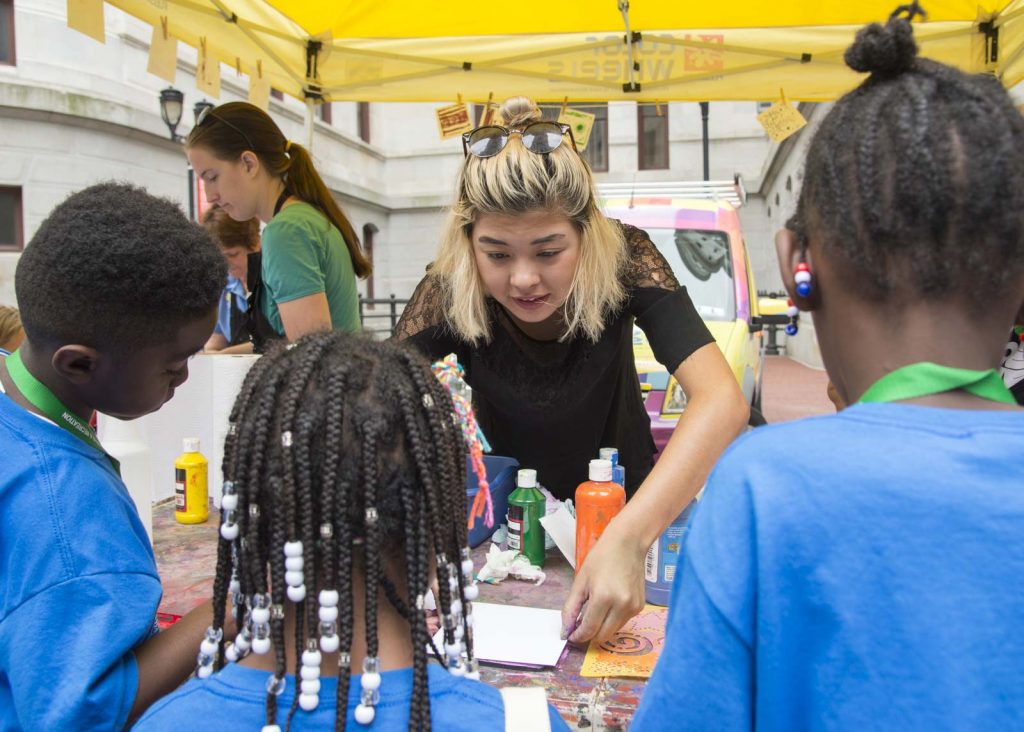
The van is equipped with the tools and supplies needed for Fleisher’s teaching artists to guide community members in hands-on culturally inspired mini-workshops, collaborative public art projects, and art technique demonstrations.
In the Press
Taking the Swiss Army Knife of Art to the People
Philadelphia Inquirer
Fleisher van: art classes on wheels
WHYY / Newsworks
For 4th Year, PNC Bank Gives $1 Million to Area Arts Organizations
CBSPhilly.com
Mobile art program hits streets of South Philly
Philadelphia Tribune
Lead support is provided by PNC Arts Alive.
Projects
-
PARKING LOT PROJECT: BOOK MAKING WITH CITYSCAPES
ColorWheels’ Parking Lot Projects are designed to bring creative experiences to you when can’t visit ColorWheels at its favorite spots around Philadelphia. The projects are designed for families and artists of all ages and can be completed with minimal art supplies and easily obtained objects. This project was designed by ColorWheels teaching artist Katie Kaplan. When you’re done, don’t forget to take a picture of your work and share your work online with #colorwheelsparkinglot! ColorWheels is presented by PNC Arts Alive.
Inspiration
While spending lots of time inside, I found myself looking out the window into the city and admiring the buildings. After reading Making Books with Kids by Esther K. Smith, I was inspired to share this exciting bookmaking process. We will be exploring how to make an accordion fold book with drawings from your imagination or real reflections of your city. This book is made by folding and cutting the silhouettes of buildings to make your own book cityscape.Materials
-
- One sheet of paper (8.5 X 11 works great)
Scissors
Glue Stick
Pencil/pen/markers (whatever drawing material you feel compelled to use)
Getting Started
As you dive into this project, take a few moments to explore Lorna’s work and ask yourself the following questions. We’ve included Amira’s thoughts to help get you started.What buildings are important to you?
Look around your neighbor and reflect on the places you go most. For me, as I look down the street I see the place I go for pizza and the one I go for donuts. Take a moment to do the same.What did you notice about the buildings?
Are they tall? Short? Colorful?Take a look at the work of artists such as Edward Hopper or Frank Gehry to spark some creativity.
Building Your Artistic Vocabulary
Accordion book: a book folded to look like an accordion or fan shapeSilhouette: the dark shapes you see when an object is backlit
Cityscape: in the visual arts a cityscape is an artistic representation, such as a painting, drawing, print or photograph, of the physical aspects of a city or urban area. It is the urban equivalent of a landscape.
Step one: We will fold our paper into fourths on the longest length of your paper. Now open the paper and fold the final panel in half the opposite direction. The visual above shows where your folds should be.

Step two: you will be cutting out the shapes of your roof top, cityscape, or your building silhouette. Get inspired by looking out your window or cut out shapes that feel appropriate with your scissors. Be sure NOT to cut the last folded panel.

Step three: you will fold the two panels that were not cut into each other and then glue them together. It is time to fold your book into the accordion by making sure each panel stacks on top of another. You may have to reverse the previous folds.

Step four: Draw or decorate it to make it look like a city. When finished fold it back into an accordion book and stack some books on top of it to help the pages stay put.About the teaching artist:
Megan Larson is an educator, artist, and world traveler. She served in Peace Corps Jamaica from 2016 to 2018, where she taught both art and literacy classes. Prior to Peace Corps, she worked as an elementary art instructor in Thailand. When she is not teaching, she continues to learn new techniques and attends workshops across the United States in notable locations such as Arrowmont School of Arts & Crafts in Tennessee, Sitka Center for the Art and Ecology in Oregon, and Manhattan Graphics Center in New York City. While Megan’s artistic background is in printmaking and papermaking, currently she is exploring natural dyeing and ink making. She resides in Philadelphia and teaches in Fleisher’s Saturday program for young artists. -
-
PARKING LOT PROJECT: SLOW FASHION – TIE DYE WITH NATURAL MATERIALS
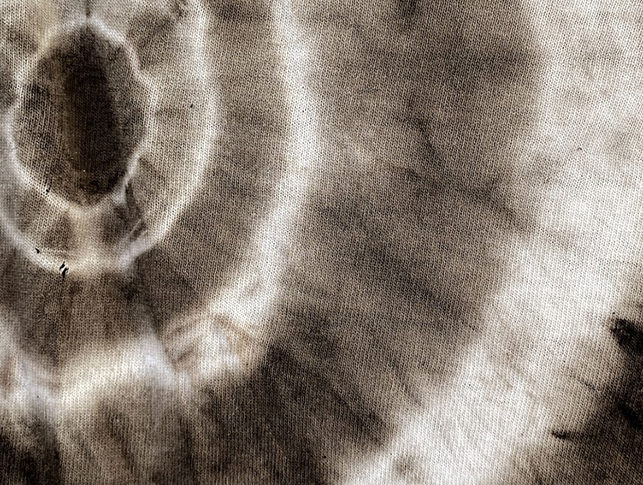
ColorWheels’ Parking Lot Projects are designed to bring creative experiences to you when can’t visit ColorWheels at its favorite spots around Philadelphia. The projects are designed for families and artists of all ages and can be completed with minimal art supplies and easily obtained objects. This project was designed by ColorWheels teaching artist Katie Kaplan. When you’re done, don’t forget to take a picture of your work and share your work online with #colorwheelsparkinglot! ColorWheels is presented by PNC Arts Alive.
In the first months, former partners will try to regain the location of the zodiac sign, but this relationship will no longer be of the same open nature. The love horoscope advises Aries to embrace a new life, and not cling to the past chatrulet nude and try to revive the extinct passion. In addition, this period will be filled with vivid acquaintances, among which you can find a real treasure.
At the same time, the Ox will bring confusion to the feelings of Aries and inflame his attention. The sign of the Zodiac will literally bathe in love and adoration, his life will sparkle with new colors.Inspiration
Natural dyes are pigments derived from natural resources such as plants, fungi, lichens, minerals, and insects. Working with natural pigments is an ancient practice, used all over the world to create strikingly beautiful textile arts and crafts. Many artists, looking for a more environmentally concsious use of materials, are returning to this practice to foster a greater connection to the natural world. In this project, you will learn to use natural materials and found objects to create a tie dyed piece of clothing or fabric.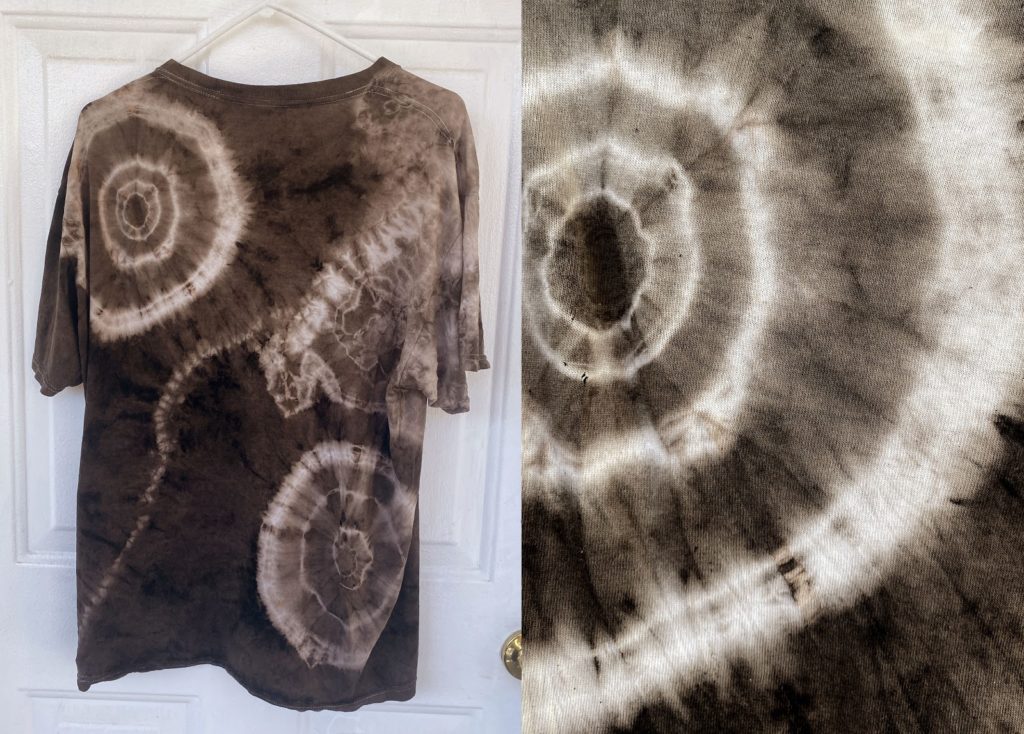
Instructions and Materials
This is a three-part project that is suitable for families and people of all ages. It will take about one week to create the dye, so plan accordingly! To complete the project, you’ll need:
-
- A 100 percent cotton, white clothing item or fabric.
Natural dyes work only on 100 percent natural fibers. Old clothes that have been washed many times actually absorb the dye better! If using a new garment, make sure you wash it in hot water before starting.
A jar with lid
Vinegar
Steel objects (old nails, chains, or anything else you can find)
String, yarn, rubber bands and/or dental floss
Scissors
Large bucket or old cooking pot
Gloves
Building Your Artistic Vocabulary
Natural pigments: an organic compound that gives a characteristic color to plant or animal tissues and is involved in vital processes. Chlorophyll and hemoglobin are examples of pigments.
Found objects: natural or manmade objects, or fragment of an object, found by an artist and kept because of the potential the artist sees in it.
Mordant: a mordant is a mineral that acts as a bond between the fiber and the constituents within the natural dye.
Tannins: a yellowish or brownish bitter-tasting organic substance present in some galls, barks, and other plant tissue. Tannins are used in tanning leather and dyeing textiles, manufacturing ink, clarifying wine and beer, and in medicine.
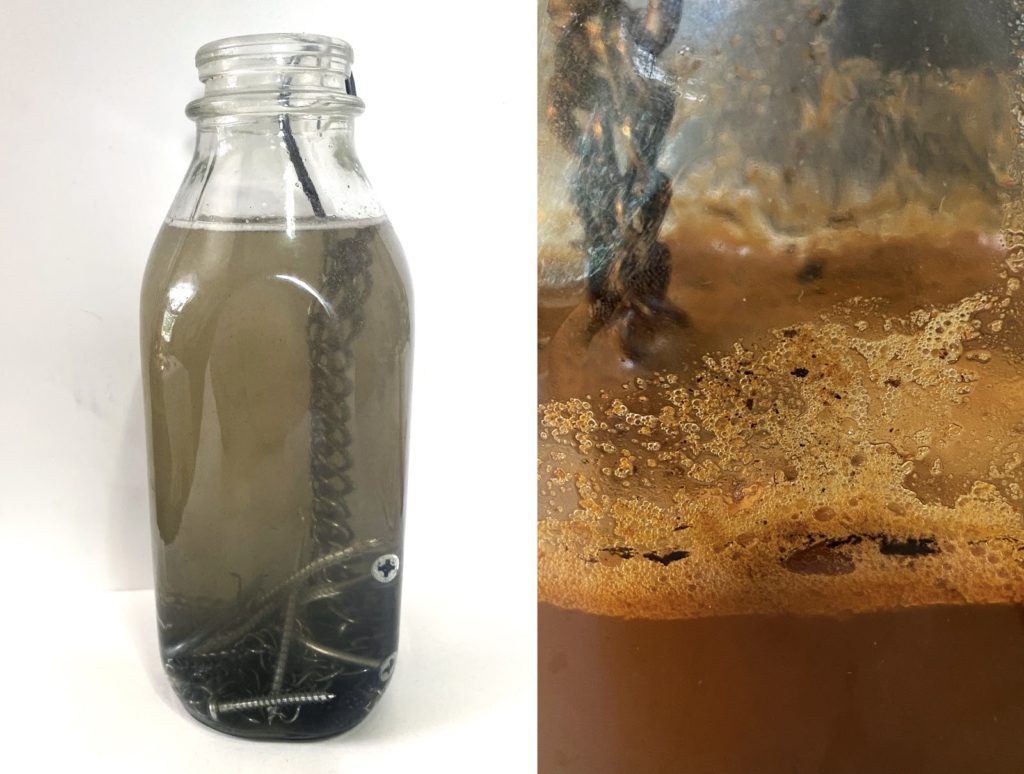
Part one: creating the iron solution. When using most natural dyes, you will need to use a mordant in order to get the most vivid colors. Without a mordant, the natural dye will not create a strong bond with the fabric, creating very light colors. Different types of mineral mordants will create different colors with each natural dye. Mordants can be ordered online to create a rainbow of colors on your fabrics, but for this project we will be creating a liquid solution of iron (ferrous sulfate) from household objects. Iron is what’s called a “saddener,” which means it always creates a dark color.
-
- 1. Fill your jar with any small steel objects you can find: old nails, chains, the rustier the better! A handful of objects will be enough. If you are not sure that the item is steel, you add it in anyway as it will not hurt your solution. You may want to take a walk to collect objects from the street.
Adults should only handle sharp objects, but kids can watch and help point things out.
2. Add two parts water and one part vinegar to the jar, covering all the objects.
3. Close lid tightly.
4. Let it sit for one week and watch as liquid turns an orangish brown!
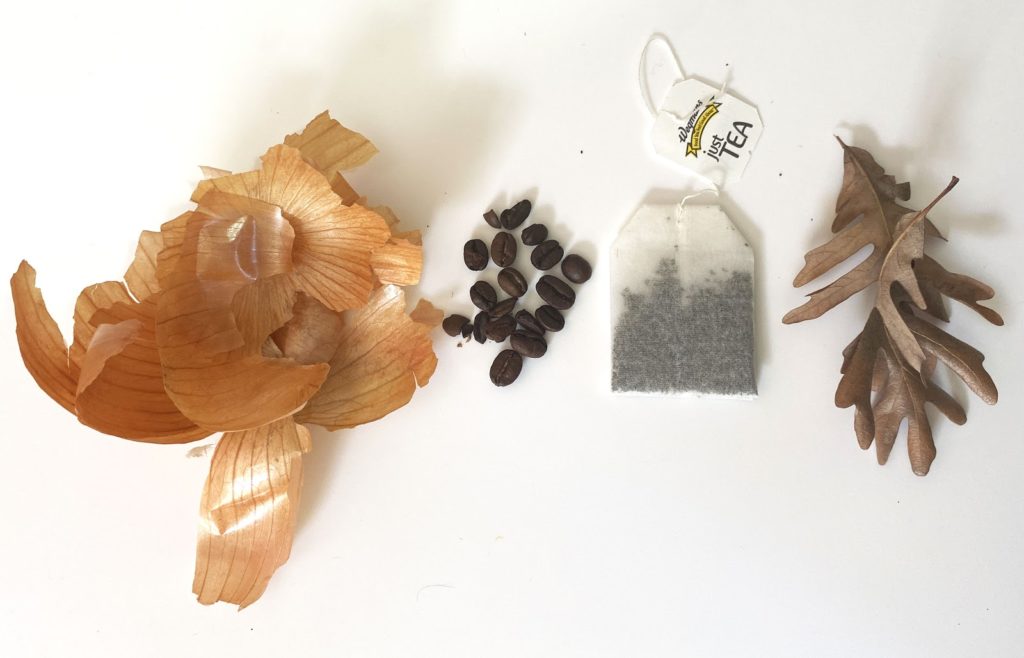
Part two: collecting natural materials. While you are waiting for your iron solution, spend the week collecting outside and saving waste from your kitchen. The more you collect, the darker color your fabric will be and the more fabric you can dye. Natural dyes work because a chemical bond is created between the fiber, mordant, and substances in the dye. For this project, we are looking to collect things that contain a substance called tannins. Tannins are found in millions of plants. For this part of the project, take a walk outside with a bag or basket and see if you can collect various sources of tannins. You can also find many tannin rich sources in your kitchen. Tannins are what causes tea to be brown and slightly bitter.
Tannin-rich materials include: acorns, black walnuts, tree bark (only from the ground, don’t hurt the tree), fallen tree leaves, oak galls, onion skins, avocado peels and seeds, pomegranate skins, orange peels, tea, coffee.
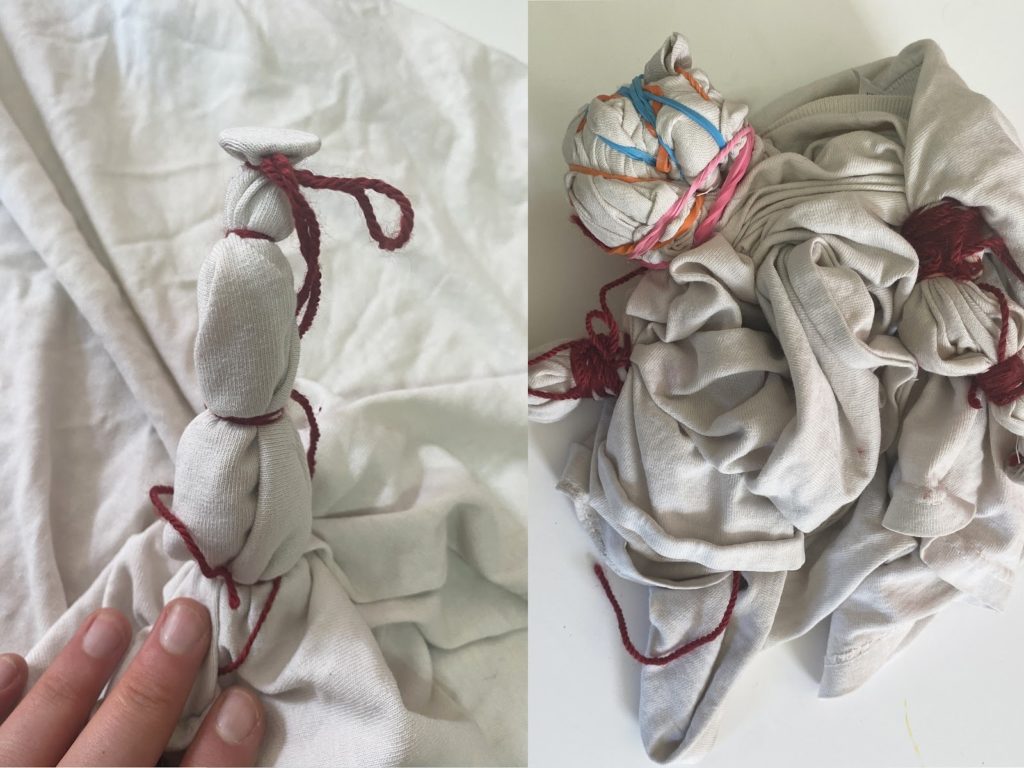
Part three: tie dying. There are many ways to tie and bind your fabric to create different designs. By tightly binding the fabric with string or rubber bands, the dye cannot reach certain areas of the fabric, allowing them to remain white. This process is called shibori, and you can find examples of different techniques by searching online.
-
- 1. Put your natural materials into an old pot with water and bring to a simmer on the stove.
2. Pour your liquid iron into the pot, straining out any metal pieces.
3. Place your fabric into the pot and stir.
4. Let simmer for one hour (less if you desire lighter colors or more for darker colors).
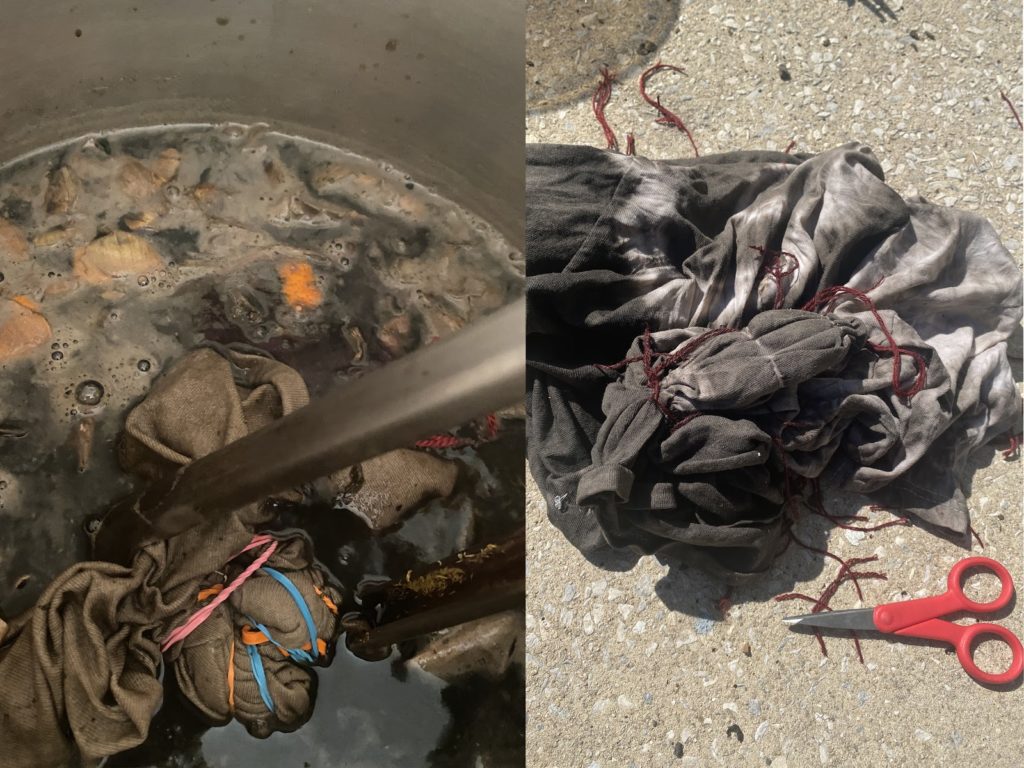
If you do not have an old pot to use, pour boiling or hot water into a bucket with your dye materials and iron solution. Let your fabric sit overnight or longer. Once your fabric is done in the dye bath, squeeze it out over the pot or bucket while wearing gloves. Take your garment outside and untie or cut all the tied areas. Hang it to dry, and wait one week before washing.
About the teaching artist:
Katie is a visual artist living and working in Philadelphia. In her multidisciplinary practice, she has a focus on exploring printmaking at the intersection of sculpture, fiber arts, installation, and video. For more than 10 years, she has worked as a professional teaching artist and community artist, work that is critical and intrinsic to her art practice as a whole. -
-
PARKING LOT PROJECT: MAKE YOUR OWN SNAKE
ColorWheels’ Parking Lot Projects are designed to bring creative experiences to you when can’t visit ColorWheels at its favorite spots around Philadelphia. The projects are designed for families and artists of all ages and can be completed with minimal art supplies and easily obtained objects. This project was designed by ColorWheels teaching artist Juan Tang Hon. When you’re done, don’t forget to take a picture of your work and share your work online with #colorwheelsparkinglot! ColorWheels is presented by PNC Arts Alive.
Inspiration
Snakes are one of Juan’s favorite animals, especially when they appear in art. Their shapes and patterns are so fun and versatile, and Juan wanted to demonstrate one of the many ways you could make your own colorful and super long snake.Getting Started
As you dive into this project, take a few moments to ask yourself the following questions: what does a fun snake look like? What colors would you see? How long is your snake? Is it short or very, very looooooong?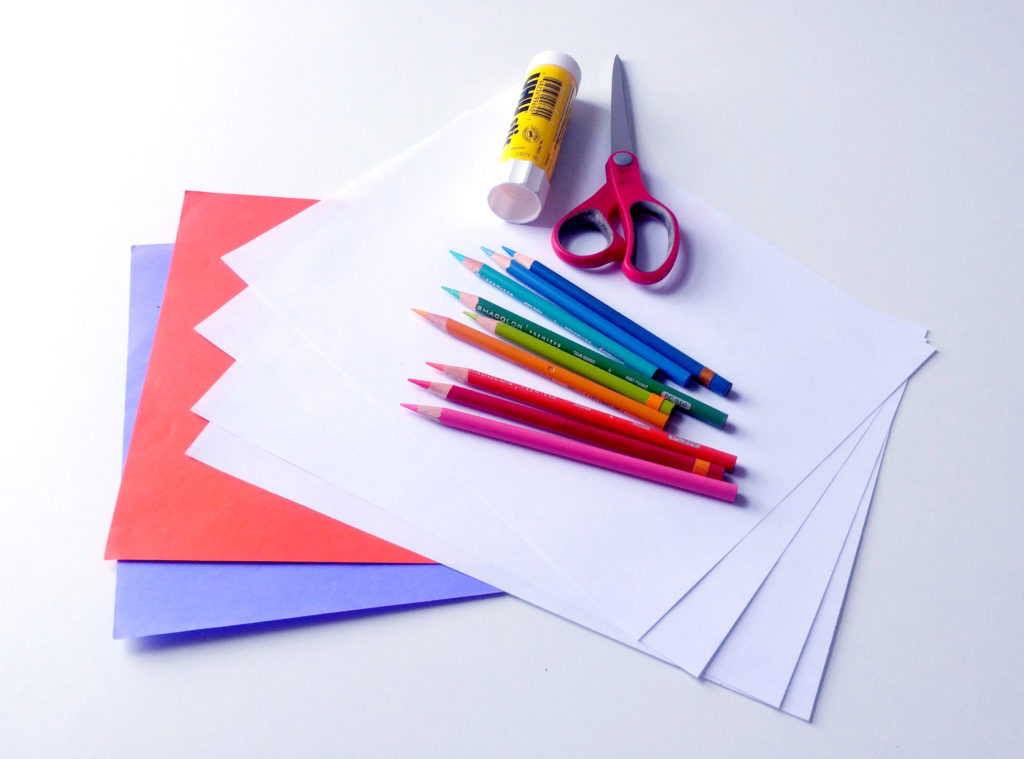
Required Materials
To complete this project, you’ll need:
-
-
- Construction or colored paper (or white paper you can color)
-
- Scissors
-
- Glue
-
Drawing materials (anything from colored pencils, makers, paint, etc.)
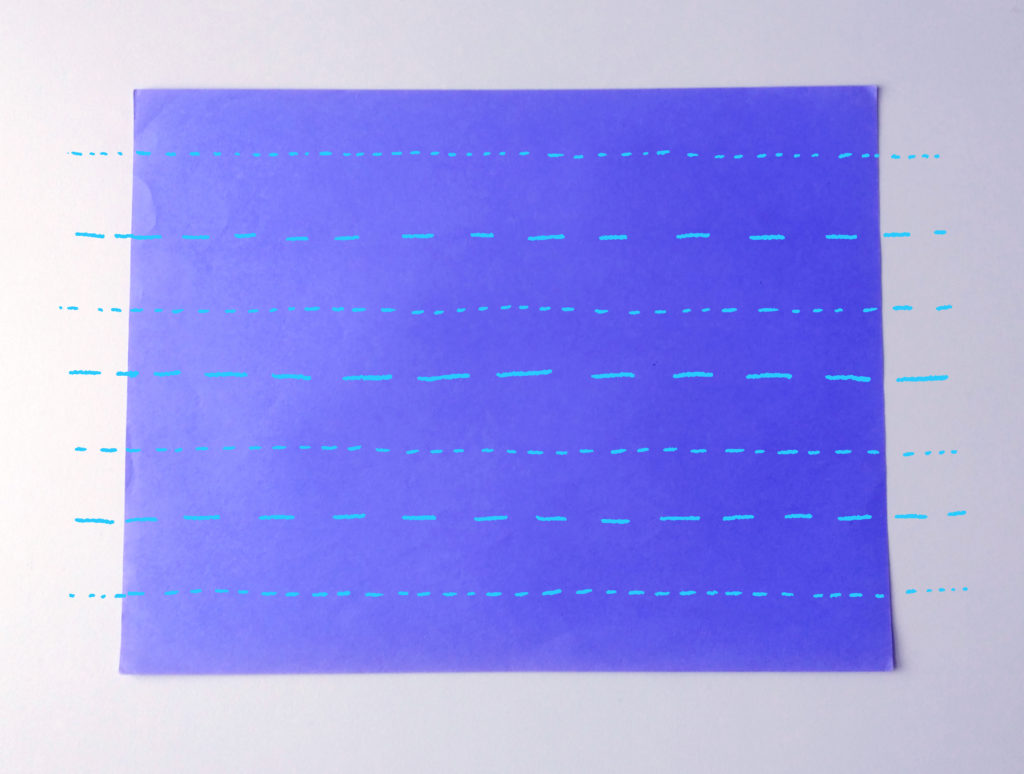
Step one: first we will make the snake body out of paper garlands. Take one sheet of paper and fold it in half horizontally. Fold it in half again and then one more time. Unfold the paper. You should have a lot of long folded strips. Cut the strips following the creases.
If you want to do a two-colored snake, repeat this step with another piece of colored paper.
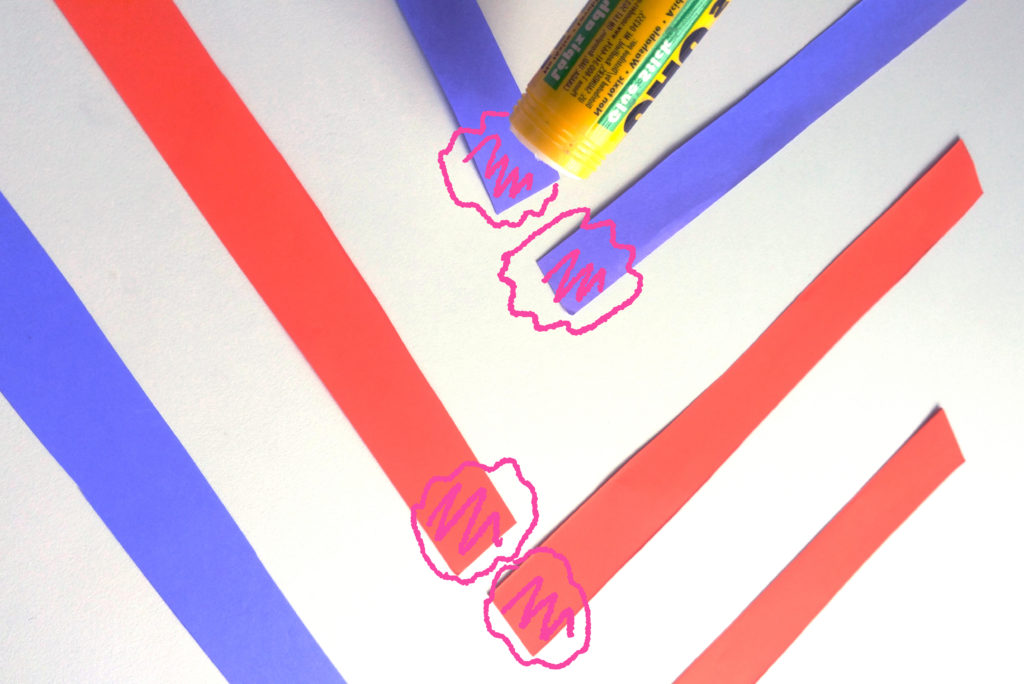
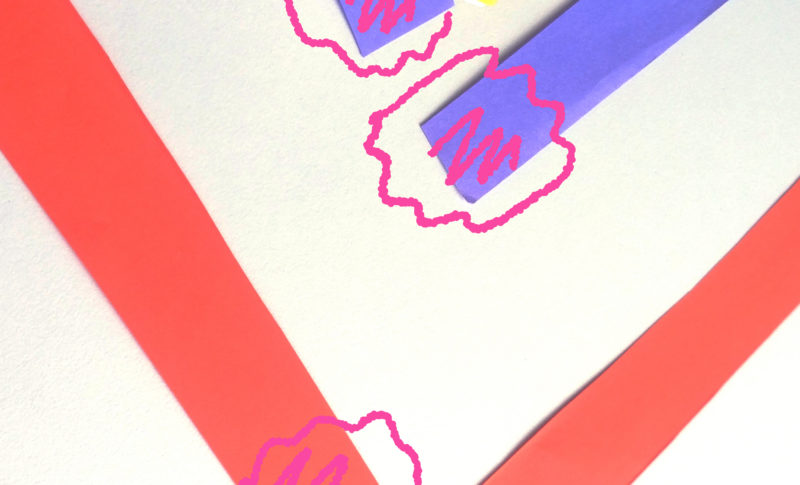
Step two: arrange two of your strips into an L shape and glue the ends where they connect.
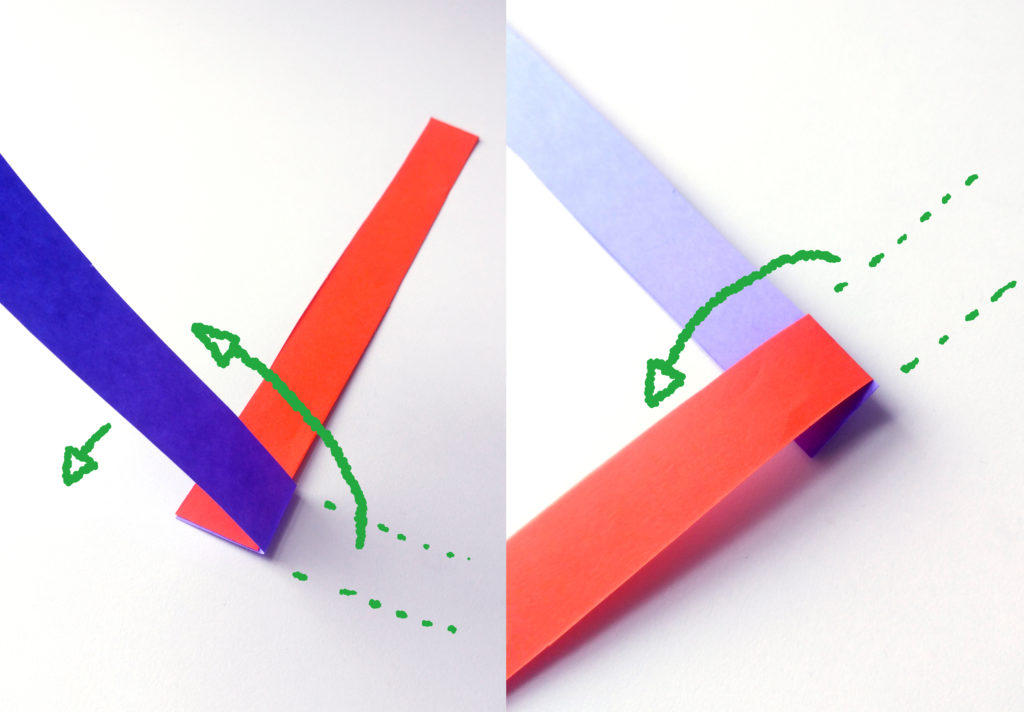
Once the strips are glued and dry, begin folding one strip over the other.
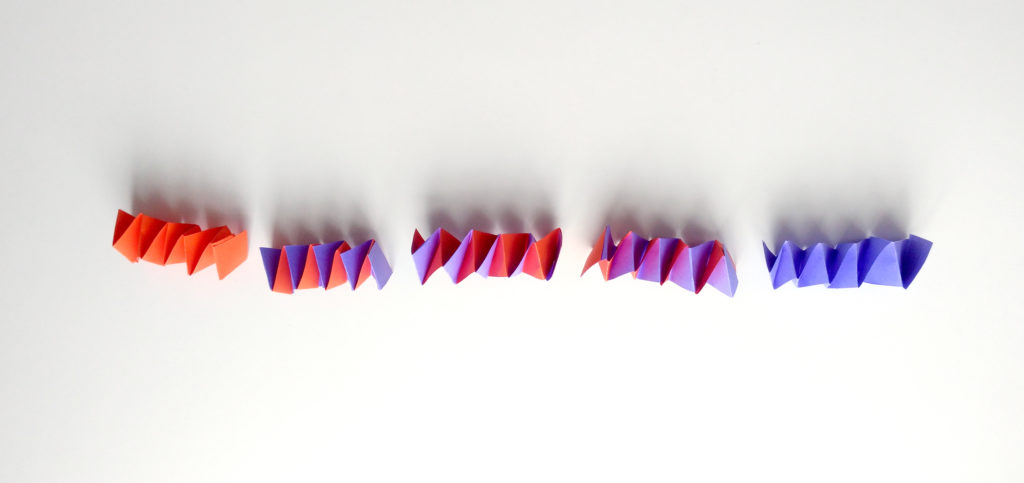
Repeat until the end. Glue the last fold onto the previous fold to secure it. Keep repeating these steps until you reach your desired length.
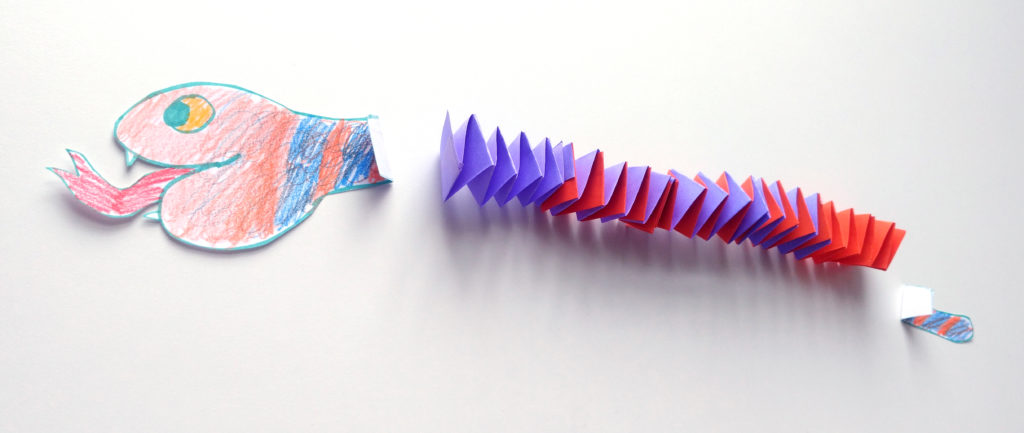
Step four: once you have made enough segments, glue them all together. To finish the snake, draw, color, and cut out a head and tail. Notice how both the head and tail have a little part that is folded up. This is to glue the head and the tail to the body.
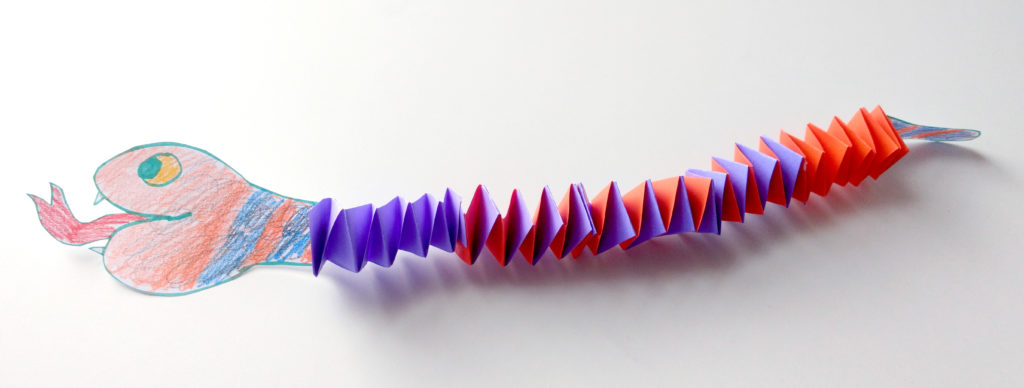
Enjoy your finished snake! If you have enough paper, why not make it some friends?About the teaching artist:
Juan is an illustrator and printmaker from Panama. He graduated from the Rhode Island School of Design, majoring in illustration. He is a teaching artist in a number of Fleisher’s community programs as well as the after-school Creative Labs. He enjoys exploring a variety of materials and mediums. -
-
PARKING LOT PROJECT: MIXED MEDIA COLLAGE INSPIRED BY LORNA SIMPSON

ColorWheels’ Parking Lot Projects are designed to bring creative experiences to you when can’t visit ColorWheels at its favorite spots around Philadelphia. The projects are designed for families and artists of all ages and can be completed with minimal art supplies and easily obtained objects. This project was designed by ColorWheels teaching artist Amira Barnes. When you’re done, don’t forget to take a picture of your work and share your work online with #colorwheelsparkinglot! ColorWheels is presented by PNC Arts Alive.
Inspiration
Lorna Simpson is an African American photographer and multimedia artist. In one of her collage series, she magnifies the beauty of black women’s hair by transforming them into fluid, colorful watercolor paintings. Lorna took images of black women from Ebony and Jet magazines, cut their polished hairstyles, and replaced them with freeform ink and watercolor swirls.Getting Started
As you dive into this project, take a few moments to explore Lorna’s work and ask yourself the following questions. We’ve included Amira’s thoughts to help get you started.What does your hair mean to you?
The way you do your hair is a form of self-expression. Like most black girls, I didn’t always have the best relationship with my hair. But once I got older, I realized it was my duty to love every part of myself, including my hair.Can you think of any positive memories involving your hair?
One of my fondest hair memories is when I dyed my hair for the first time. My mom wouldn’t let me dye my hair until I was responsible enough to take care of it on my own. Once I was allowed to, there was no stopping me. Since then, my hair has been an array of colors, and I have loved every one.
Instructions and Materials
Using materials such as salt, rubbing alcohol, and a straw, you will learn how to manipulate watercolor. You’ll also learn the wet on wet technique to create fluidity in your piece. You’ll need:
- Watercolor paper (you can also use any paper or a piece of cardboard)
- Watercolor paints (you can also markers or crayons)
- Paint brush (you can also use a toothbrush, cottons swabs, or your fingers)
- Glue
- Cup of water
- Photocopy of a favorite picture of yourself, loved one, or a magazine image of a person
- Scissors
- Straws (optional)
- Rubbing alcohol (optional)
- Salt (optional)
Building Your Artistic Vocabulary
Watercolor: watercolor is a painting method in which the paints are made of pigments suspended in a water-based solution. Watercolor refers to both the medium and the resulting artwork.
Self-expression: the expression of one’s feelings, thoughts, or ideas, especially in writing, art, music, or dance.
Wet on wet technique: a painting technique in which layers of wet paint are applied to previously administered layers of wet paint.

Step one: find a favorite picture of yourself, guardian, or loved one (a magazine image could work as well) and give them a trim by cutting out their hair. Glue the image to your watercolor paper.

Step two: take a brush soaked in water and block in your desired hair shape. Using two or three colors, paint them on top of the wet area. If you want to create a crazy style, take your straw and blow the paint in any direction.

Step three: while the paint is still wet, sprinkle salt around the painting to create a galaxy effect. This effect can also be achieved by sprinkling rubbing alcohol on the wet areas.

Step four: once the painting is dry, use a dry brush or your fingers to brush the salt off your panting. Admire your masterpiece!About the teaching artist:
Amira is a Philadelphia-based painter who works in acrylics and ink. “My primary subject is portraits because I’ve always been drawn to the stories they tell. As I grew as an artist, I steered away from traditional skin colors and took more a colorful route to highlight the vibrancy in each individual I paint,” Amira says of her work. When she is not painting portraits Amira can be found supporting ColorWheels events as a lead teaching artist, inspiring Fleisher’s youth as a faculty member of our Saturday Youth program, and assisting visitors at Fleisher’s front desk. -
PARKING LOT PROJECT: FOOD PATTERNS INSPIRED BY YAYOI KUSAM
ColorWheels’ Parking Lot Projects are designed to bring creative experiences to you when can’t visit ColorWheels at its favorite spots around Philadelphia. The projects are designed for families and artists of all ages and can be completed with minimal art supplies and easily obtained objects. This project was designed by ColorWheels teaching artist Rana Sindhikara. When you’re done, don’t forget to take a picture of your work and share your work online with #colorwheelsparkinglot! ColorWheels is presented by PNC Arts Alive.
Inspiration
Yayoi Kusama is a Japanese contemporary artist who works primarily in sculpture and installation but is also active in painting, performance, film, fashion, poetry, fiction, and other arts. Yayoi loves pumpkins and has used them in her artwork often.Getting Started
As you dive into this project, take a few moments to explore Yayoi’s work and ask yourself the following questions. We’ve included Rana’s thoughts to help get you started.What patterns and colors do you see in Yayoi’s work?
Polka dots, cracked lines, yellow, green, blue, purple, and pink.What fruit or vegetable do you like?
Rana’s favorite is papaya YAYOI KUSAMA, “ALL THE ETERNAL LOVE I HAVE FOR THE PUMPKINS”01
Instructions and Materials
With just a few materials, you can explore the organic shapes of fruits and vegetables while using colors to create interesting patterns. You’ll need:
– White paper
– Pencil/pen
-Markers, crayons, or color pencils
Building your artistic vocabulary
Contemporary artist: an artist who is currently still living and making artwork.
Background: the area or scenery behind the main object in an image.
Pattern: a repeated decorative design.

Step one: pick a favorite fruit or vegetable and, using a pencil or pen, draw it in different sizes on your paper. Make sure to draw it at least five times.

Step two: once you finish drawing your fruit or vegetable, break the background up into five sections.

Step three: using different colors, fill in each fruit or vegetable and section with a different pattern.

Step four: color in your piece completely.
About the teaching artist:
Rana is a graduate of Tyler School of Art, Temple University and holds a masters of multicultural education from Eastern University. She has worked for Fleisher since 2005, teaching classes on and off-site, with both children and adults, after-school, on the weekends, and in the summers. Rana lives in Port Richmond with her husband, three cats, and a dog. “I find Yayoi Kusama’s work to be breathtaking and beautiful and fun. I wanted to give that experience to my students,” she says. -
PARKING LOT PROJECT: ABSTRACT ART INSPIRED BY REGGIE LAURENT
ColorWheels’ Parking Lot Projects are designed to bring creative experiences to you when can’t visit ColorWheels at its favorite spots around Philadelphia. The projects are designed for families and artists of all ages and can be completed with minimal art supplies and easily obtained objects. This project was designed by ColorWheels teaching artist Amira Barnes. When you’re done, don’t forget to take a picture of your work and share your work online with #colorwheelsparkinglot! ColorWheels is presented by PNC Arts Alive.
Inspiration
Reggie Laurent is an American painter that creates vibrant abstract pieces with shapes that dance from corner to corner. The shapes in his work effortlessly flow together without ever planning a single detail, allowing for the piece to take on a life of its own. “My art imitates life because it is representative of the diversity and inclusion of every culture, the backbone of what makes the world such an interesting place,” he says of his work.Getting Started
As you dive into this project, take a few moments to explore Reggie’s work and ask yourself the following questions. We’ve included Amira’s thoughts to help get you started.Are there any recognizable symbols?
He uses a lot of organic shapes in all of his work and includes symbols, such as “love” and happy faces, in some of his pieces.How would you describe the energy of his work?
His uses of organic lines and shapes gives his pieces a very high, busy energy.What do you think his first and final steps are?
He often uses white lines to brings all the shapes together.
Instructions and Materials
You will learn about mark making, applying patterns, and different types of lines to create movement in your work. Learning Reggie’s loose style will also teach you how to surrender control and allow your piece to develop on its own. You’ll need:
-
- -A black marker
- -Glue
- -Scissors
- -Paint brushes
- -Acrylic paint
- -A piece of cardboard
Building Your Artistic Vocabulary
Abstract: art that does not attempt to represent reality.
Organic shapes: irregular shapes or asymmetrical in appearance and tend to have curves. Nearly all shapes found in nature are organic in appearance.
Symbol: a mark or character used as a conventional representation of an object, function, or process.
Mark making: a term used to describe the different lines, patterns, and textures we create in a piece of art.

Step one: decide what shape you want your base to be – circle, square, triangle, etc. – and cut your piece of cardboard down to size. It should be about 8 inches by 8 inches, but feel free to go bigger if you are up for the challenge! Once you have your desired shape, paint the entire surface black.

Step two: while the base dries, take some leftover cardboard and draw organic shapes and symbols with your marker. Once the marker dries, cut out your shapes.

Step three: glue your shapes to the base in any way you see fit. Using different colored paints, fill the shapes with different lines, patterns, and textures.

Step four: for the finishing touches, use a small brush and white paint and outline your shapes. The white lines will tie your shapes together and make them stand out even more!
About the teaching artist:
Amira is a Philadelphia-based painter who works in acrylics and ink. “My primary subject is portraits because I’ve always been drawn to the stories they tell. As I grew as an artist, I steered away from traditional skin colors and took more a colorful route to highlight the vibrancy in each individual I paint,” Amira says of her work. When she is not painting portraits Amira can be found supporting ColorWheels events as a lead teaching artist, inspiring Fleisher’s youth as a faculty member of our Saturday Youth program, and assisting visitors at Fleisher’s front desk. -
“Art can tell you something about a person individually, but when a community comes together to create art it gives the community an identity that relates to its traditions and values.”
PHILLIP, DESIGN STUDENT
Request ColorWheels
Bring art-making activities to your next event!
Work with ColorWheels and Fleisher’s professional teaching artists to make your next event an art-filled one! The mobile art studio is equipped with the supplies needed to engage community members in hands-on culturally inspired mini-workshops, collaborative public art projects, and demonstrations of art techniques.
To inquire about availability, please submit event info via our ColorWheels Inquiry Form.
Questions before submitting? Please contact us at info@fleisher.org